Chen Stormstout: Plushie Round

If I was putting together a team of pets to frustrate the tar out of my opponent, this team would be right at the top of the list.  There’s so much luck involved that someone like me who prefers a clean predictable fight that may take longer over a shorter fight that might not work has to just roll with the punches.

Synopsis: This battle is a giant mess.  A 25% chance to be stunned (yeah right, we all it’s 90% when used by an enemy battler), a two-round sleep, 25% chance to miss, and giant damage with Barrel Toss.  This is quite a tough fight.

Goal: To defeat the tamer with 2 pets so that Elekk Plushie can be carried through the fight.


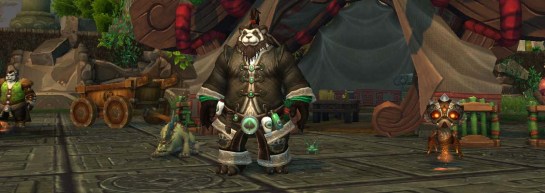
Chen Stormstout’s Team

 Tonsa with  Bite,   Headbutt, and  Chew
 Chirps with  Flank,   Lullaby, and   Locust Swarm
el16
 Brewly with  Brew Bolt Barrel Toss, and  el16 Inebriate


Your Team

hu16 Flayer Youngling (h/s, p/s, s/b) –  Triple Snap, hu16 Deflection, hu16 Kick
hu16 Corefire Imp –  Rush, el16 Immolation, ma16 Wild Magic
ma16 Elekk Plushie

Start off with your Flayer Youngling and use Deflection.  This will block the incoming Headbutt and assure you don’t get stunned.  Hit your Triple Snap and then Kick the incoming Bite.  The preloaded Chew will still hit you.  Triple Snap twice more and then deflect the Headbutt.  Use Triple Snap 2 times more and Tonsa should be dead.  At this point, you have Triple Snapped 5 times for a total of 15 possible hits of 140-150ish damage.  You’ll need at least 9 of those Snaps to actually happen to make it sure you’ve made it through Tonsa with enough health left over for Brewly.

When Chirps comes in, the first thing he will do is use Lullaby to put you to sleep.  This causes no damage, so you can safely leave your Flayer in until he’s asleep.  Swap to your Corefire Imp immediately after and use Immolation.  Cast Wild Magic right after that and then just keep hitting him with Rush until Chirps is defeated.

Brewly will come in and the first thing you should do is use Rush for a guaranteed hit before you’re drunk from Inebriate.  You’ll be able to use Rush 2 more times before you get pelted with Barrel Toss and die, and you’ll probably only hit with one of them due to your chance to miss.

Bring your Flayer Youngling back in to finish the fight.  There are a lot of variables near the end the fight here, so use your avoidance tactics wisely to finish the fight.  Brewly always casts Inebriate after it falls off, so use Kick to block it and get 2 turns with 100% accuracy.  Dodge any incoming hit that might kill you with Deflection and Triple Snap when Barrel toss is charging or you have nothing else to do.  I would imagine your Elekk Plushie is level 25 by the time you’re taking on the Celestial Tournament trainers, so you can even use him to take a hit or two while squeezing an extra hit in between the damage-free rounds of Inebriate/Barrel Toss/Barrel Toss hit.

The maddening thing about this fight is all the chances to miss, dodge, sleep, or be stunned.  The above strategy takes as much of the RNG as it possibly can for a very high percentage of winning.  Headbutt is always dodged and Lullaby is taken by a pet that is intended to be swapped out.  Inebriate gets off only one time, but that’s four rounds of 25% chance to miss.  Out of 20 tries, I succeeded in finishing the fight with 2 pets 18 times, so I’m calling that good enough.  Let me know in the comments below if you have a better strategy!

Taran Zhu: Plushie Round

zhuwide

This fight took me the longest to find a viable strategy that was reliable.  Some strategies I used worked fine 50-70% of the time, but unlucky crits caused my team severe pain.  The below strategy has worked for me 10 times in a row, so I feel really good about recommending it to you now.

Synopsis: Bolo, Yen, and Yi hit REALLY hard.  Not only that, every time they hit you, they heal up from the Human racial ability!  Yi is the fastest of the bunch, so bringing someone that’s faster than him helps a LOT.  Your Molten Hatchling must be a s/s breed which means he has 341 speed.  This makes him faster than the 319 speed of Yi.

Goal: To defeat the tamer with 2 pets so that Elekk Plushie can be carried through the fight.


Taran Zhu’s Team

hu16 Yen with hu16 Takedown,  hu16 Blackout Kick, and  Feign Death
hu16 Bolo with hu16 Punch,  hu16 Blinding Powder, and   Rampage
hu16 Li with  Triple Snaphu16 Bandage, and  hu16 Spin Kick


Your Team

 Molten Hatchling (s/s) –  Leech Life, el16 Cauterize,  Brittle Webbing
hu16 Flayer Younglinghu16 Blitz, hu16 Deflection, hu16 Kick
ma16 Elekk Plushie

Start off with the Molten Hatchling and cast Brittle Webbing.  Use Leech Life to heal back the life you just lost and you’ll get stunned.  Pass your next round and then use Leech Life again.  Cauterize the big hit you just took, Brittle Webbing, and Leech Life will bring Yen under 50% health.  At this point, you want to swap to your Flayer Youngling because Yen will Feign Death at the same time.

With your Flayer Youngling in, start with Blitz.  Kick next to interrupt Bolo’s Rampage and then use Deflection to block the Blinding Powder.  Blitz twice more and Kick to interrupt Rampage again.  Blitz once more, and then Bolo will blind you.  This is fine because you will use Deflection on the next attack.  This just gave you a round of free damage.  Blitz one more time to finish off Bolo.

During the Bolo fight, you may find that you killed Bolo earlier than what was expected.  This is fine as long as you have either Kick or Deflection up.  When Yen comes back in the first thing he will do is try to stun you.  Use either Kick or Deflection to avoid it and then Blitz him down.

When Li comes in, your Flayer Youngling may or may not get some damage in on him.  Just Blitz until you die and bring your Molten Hatchling back in.  Cauterize right off the bat.  Use Brittle Webbing then Leech Life right after.  Brittle Webbing is your only ability off cooldown, so use it and then Leech Life again.  Cauterize is off of cooldown, so heal up again with it.  One last set of Leech Life – Brittle Webbing – Leech Life should finish Li off.  If he heals near the end, just keep Leech Life-ing and Brittle Webbing him to finish the fight.

Yu’la, Broodling of Yu’lon

yula

Goal: Defeat Elite Pet with optimal pets

Yula, Broodling of Yu’lon’s Abilities:

  • Jade Breath
  • Emerald Presence
  • Lift-Off

Your Team:

First off, I’ll say that you really only need Mr. Bigglesworth to take down Yu’la.  The other two pets are completely spectators and only serve as backup.  Each of the backup pets are faster than Yu’la and have the Kick ability.  This allows you to Kick Yu’la right before Emerald Presence falls off preventing her from using it for 1 round.  During this round you’ll get full damage with Blitz or Jab, depending on the pet you might bring in.  Bring in Mr. Bigglesworth and use the following abilities in the same order every time and you beat Yu’la easily;

  • Claw
  • Ice Tomb
  • Ice Barrier
  • <pass turn>
  • Claw
  • Claw

Make sure you begin again with Claw before you start the Ice Tomb/Barrier and barring terrible luck, you should be able to solo Yu’la.

Other thoughts:  This strategy has been floating around the big name sites for a while (wowhead, warcraftpets), I just figured I’d go ahead and add it to my collection of strategies.

Courageous Yon

yonGoal: Defeat tamer with two level 25 pets and one low level pet for maximum pet experience

Courageous Yon’s Team:

  • Piqua – Squawk, Lift-Off, Flock
  • Lapin – Adrenaline Rush, Burrow, Flurry
  • Bleat – Bleat, Chew, Stampede

Your Team:

Cast any ability with your level pet, swap to Whelpling and cast Tail Sweep twice, Arcane Storm, Mana Surge. This order is important because you should end up with the Dragonkin bonus ready to hit Lapin for 80% of his health after taking Piqua from 75% to 0 in one hit.  Swap to Flayer when the Whelping dies, Triple Snap and Rampage your way to victory while using Deflection to block Chew.


mopwod tested & approved.